5 Steps to Replacing a Drop-In Kitchen Sink

Whether you’re working on a full kitchen remodel or making a few upgrades, you might want to replace the sink. Updating this feature can instantly transform the room, especially if your old one shows signs of wear and tear. Drop-in sinks are one of the most popular styles available, and they’re fairly simple for homeowners to install themselves. Here are the basic steps to follow.
How Can You Install a Drop-In Sink Properly?
1. Gather Supplies
The first step is making sure you have the right materials for the job. This includes an adjustable wrench, various screwdrivers, pliers, a putty knife, silicone caulk, plumber’s tape, and any new drain parts that the sink requires. Before purchasing a sink, measure the one you currently have to ensure the replacement fits properly. Also, pay attention to how deep the basin is. If the replacement hangs too low, it can interfere with the drain lines.
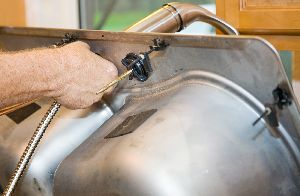
2. Remove the Old Sink
Once you’re ready to begin, turn off the kitchen’s water supply and unplug the garbage disposal. Then, disconnect the hot and cold water connections beneath the sink and detach the drain trap. Next, unscrew the clips fastening the sink to the countertop. Finally, lift the old sink out and remove any caulk that is left around the opening. Clean the edges of the countertop thoroughly so that the new caulk can adhere to it.
3. Install the Faucet
Next, attach the faucet to the new sink. Doing this before installing the sink is easier because you have more space to thread the plumbing lines through the holes. Follow the manufacturer’s instructions on how to do this. Most drop-in sinks come with a rubber seal that you must place under the faucet base plate, as this helps prevent water leaks.
4. Mount the New Sink
To ensure a secure placement, turn the new sink over and apply silicone caulk to the outer edges. Then, return it to the original position and lower it into the opening slowly. Press the rim firmly against the countertop so that the caulk spreads evenly. After it’s in position, tighten the mounting clips on the underside. Wipe any excess sealant with a damp cloth.
5. Make Final Connections
With the sink in place, you can finish this part of your remodel by reconnecting the drain lines, water supply lines, and garbage disposal. Check that the connections are threaded tightly, and use plumber’s tape around them to prevent leaks. Turn the water supply back on and open the faucets to test the new installation.
If you want to upgrade your kitchen sink, visit Withamsville Winnelson in Cincinnati, OH. This plumbing supply store carries everything you need to complete a kitchen remodel, including tools, fixtures, and appliances. Since 1997, this locally owned establishment has been a trusted source for high-quality plumbing supplies at affordable prices. Call (513) 753-1121 to ask about current inventory, or and visit them online to view their inventory.
About the Business

