How to Replace a Car’s Radiator

Your vehicle’s radiator minimizes excessive heat from the engine by transferring coolant. When this important temperature regulation system stops working, overheating can occur. Thankfully, securing a new or used radiator will help restore proper airflow. Before replacing the component, review the best practices below.
5 Steps When Replacing a Radiator
1. Drain Coolant
First, make sure the vehicle is off and the engine has cooled down. Disconnecting the battery will also help you avoid electric shocks, and wearing goggles and gloves will protect your eyes and hands.
Drain the old radiator by removing the cap, opening the petcock valve and draining the coolant into a plastic reservoir. You can also remove the radiator hose, which will allow the coolant to drain.
2. Disconnect the Old Radiator
On most vehicles, a series of hoses, bolts, and other connectors will need to be disconnected. These will typically include the upper and lower radiator hoses and reservoir lines. The coolant's connector, shroud, and mounting bolts will also need to be detached. Depending on the vehicle, the engine and transmission cooler lines may also need disconnecting.
3. Remove & Replace
At this point, you can safely remove the old radiator. While the part can often be raised up and out, some vehicles require removal from underneath.
Carefully lift the new radiator with both hands and insert it into place. Reconnect all the hoses, bolts, and lines. The mounting bolts are typically the first reconnections, while the radiator reservoir hose should be reserved for last.
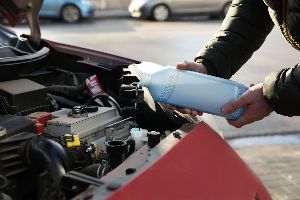
4. Replenish With New Coolant
Once the petcock valve and cap are securely closed, fill the new or used radiator with fresh coolant. As a precaution, check the transmission fluid and oil levels. During the removal process, some of these fluids may have leaked out.
Add distilled water to the new coolant for optimal efficiency. A 50/50 mix of water and coolant is generally recommended, but check the vehicle's repair manual for a more specific ratio for your needs.
5. Conduct an Air Bleed Check
During the removal and replacement process, air can become trapped in the vehicle's cooling system. This may lead to engine overheating. Thankfully, the bleeding air process can offer temperature protection.
First, start the vehicle and let it idle for at least 10 minutes. Pay attention to any signs of overheating such as smoke and any leaks underneath the car. Double-check the coolant level during this time and after the vehicle has completely cooled off. Perform this process the next day to ensure everything works properly.
If you’re planning to replace your vehicle’s radiator, head to Stewart’s Used Auto Parts in Barkhamsted, CT. They have a large inventory of parts on their nine-acre lot. In addition to having access to a computerized system for fast searches, the company uses a national parts locating service that tracks domestic and foreign car parts, including used radiators. For professional and friendly assistance, call (860) 379-7541. Visit the website for the full lineup of services.
